Feeds:
Posts
Comments

Archive for the ‘Recipes’ Category

The frozen peanut butter pie recipe is adapted from a Canadian Living recipe to make it gluten and dairy free.  I made it for my sister’s birthday and we both loved it, and then I brought it to work and no one could tell it was dairy and gluten free!!  Excellent…

Frozen Peanut Butter Pie

Ingredients 

Crust:

  • About 1 cup of gluten free chocolate chocolate-chip cookies crushed into crumbs
  • 1/4 cup melted coconut oil

Filling:

  • 2/3 cup plain coconut yoghurt
  • 2/3 cup natural organic smooth peanut butter (you could also use almond butter for a healthier option)
  • 2 tbsp (about) of almond milk
  • 4-5 tbsp of icing sugar

Topping:

  • 1/3 cup semisweet chocolate chips
  • 1/8 or a bit more… cup almond milk
  • 1/4 cup chopped peanuts
  • Fresh seasonal berries to garnish.

Directions:

  1. I bought my gluten free cookies because I was not going to have enough time to make them and they were a soft cookie that i just crumbled up.  You can get gluten free wafer crumbs or make your won cookies and  bake them so the get hard, then crumble them down and mix with the coconut oil.
  2. Pat the crumbs onto the bottom of a 9-inch pie plate and freeze for about 20 minutes.  I used coconut oil as my greaser but I have found that it is not always the best so you can try adding some gluten free flour on top of it or use good old trusty parchment paper.
  3. Meanwhile, in a bowl whisk together the coconut yoghurt, sugar and half the almond milk.  Then whisk in the peanut butter and stir until smooth, adding more almond milk if needed.  Instead of almond milk you could use coconut milk but I was not going to be around to use the rest of it for a curry and the almond milk was already open….I also used organic peanut butter with nothing added, instead of the crap the some companies market as a health choice that is already laden with hydrogenated vegetable oils and sugar so I added a bit more sugar than the original recipe called for.  I started with the original 3tbsp called for and decided it needed a bit more (some more sweetness for my sister) so I added a bit at a time to get the right sweetness.  So play around with the sugar, this recipe is extremely rich so next time i might just stick with the 3tbsp and see how everyone feels about it.
  4. Spread evenly over the crust and freeze for 1hr.
  5. For the topping, melt the chocolate and almond milk in a double boiler over medium-low heat, stirring until smooth.  I confess that I really didn’t measure out the almond milk here but you will need less than the recommended 1/4 cup whipping cream.  Can be hard to find the right balance so do your 1/8 cup of almond milk and melt that way and once the mixture has cooled a bit if you feel it’s a bit too thick then add a bit more milk, and hopefully it has cooled enough that it will not go lumpy on you!  The joys of working with melted chocolate right!
  6. Spread the chocolate mixture evenly over the peanut butter filling and then sprinkle peanuts along the edges.  Freeze for at least 1hr or until it has completely set.  When serving let it stand for about 10 minutes so it can thaw enough to get a knife through it!  You can also make it aheadof time, wrap it in foil and freeze it for up to 1 week.  (that is what the recipe says but i am sure you can freeze it for longer…)

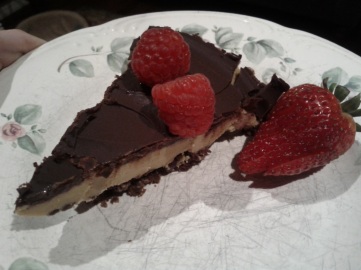
ENJOY!!!  so good and delicious that I recommend adding some berries to balance it out.  For my pie, I used raspberries instead of peanuts along the edges.

Read Full Post »

So I know that I have been MIA for a while and that is because I have been on vacation – enjoying the culture of Italy and Spain.   Now we all know that Italy is known for its food but my family was somewhat disappointed at the restaurants that we visited but we did make some excellent food with the fresh produce, meat, fish and pasta from the grocery store.  While there was not much in the fridge yesterday I did find a sleuth of veggies and some fresh basil which inspired me to make fresh pesto primavera.

Pesto Sauce – now I really didn’t take any measurements or follow any directions, I just threw everything together and blended it all together.

  • Fresh basil leaves
  • 2 cloves of garlic
  • olive oil
  • fresh lemon juice
  • sunflower seeds – I didn’t have any pine nuts but these worked well, Cashews would probably also work well.
  • sea salt and pepper to taste

Sauteed onion, garlic, green onion, zucchini, and tomatoe in some coconut oil until the tomatoes started to break up a bit.  Add some of the homeade pesto sauce to the veggies to get them coated.  Add the pasta and mix it all toghether adding some more pesto until everything is nicely coated.

Enjoy!

Read Full Post »

At the farmers market a few weeks ago I picked up large quantity of rhubarb…more than I really needed but it is a good thing that it can be frozen for later use.  So what did I do with all this rhubarb – I made Strawberry Rhubarb Muffins, Maple Apple, Strawberry and Rhubarb Crisp and Rhubarb-Apple Cobbler.  That’s right, I made all these goodies in 1 day and still had a whole bunch of rhubarb left to freeze!

 Healthy Strawberry Rhubarb Muffins – VEGAN

This is actually a recipe for Strawberry Peach Muffins but since Ontario peaches were not in season yet and I had this vast quantity of rhubarb, I decided to modify this one and I think it turned out pretty good!  I was also running low on coconut oil and this recipe calls for only a small amount of butter.

  • 1 cup all-purpose flour – I used spelt
  • ½ cup whole wheat flour – I used spelt, you could also use Bob’s Red Mill Gluten Free Mix or any other gluten free flour  (just make sure to add that xanthum gum)
  • ½ cup quick oats – I don’t have the quick oats and it still turned out fine
  • 1 tbsp baking powder
  • ½ tsp salt
  • ½ tsp cinnamon
  • 2/3 cup sugar
  • ¼ vegan butter (like earth balance) – I used coconut oil
  • ½ cup unsweetened applesauce
  • 1/3 cup play soymilk – I used plain almond milk
  • 1 tsp vanilla extract
  • ½ cup finely chopped pecans – I didn’t have
  • 1 cup fresh strawberries, diced up tiny
  • Rhubarb…trying to remember how much I used….probably 1 cup also chopped/diced tiny
    • NOTE – the actual recipe calls for 1 large peach, peeled and diced small (but I am also pretty sure that I added more than 1 peach last time I made it…ya I like to increase my fruit..)

Pre-heat oven to 350F and grease muffin tin or use your muffin cups

Whisk dry ingredients in a bowl and set aside

In another bowl add sugar, butter, applesauce, almond milk, vanilla and pecans.  Whisk together until mixed.

Add dry ingredients to this and stir until just combined

Gently fold in the fruit

Spoon into muffin tins and bake for 20-25 minutes.

These muffins are very dense and moist! Store them in the fridge and they will keep for at least 1week – mine didn’t last longer than that.

Read Full Post »

This is one of my favorite baked goods, I could eat the whole cake in one sitting!  I guess its Jewish because of the sour cream??  I haven’t made this in so long because I no longer eat dairy and am not really a big fan of substituting my dairy with soy, especially processed soy products.  So for a while I was at a loss but then I found COCONUT YOGHURT and my life was saved.. I think it taste just as wonderful as if made with sour cream.

Ingredients

  • 1/4 butter or butter alternative – I use coconut oil
  • 1 cup brown sugar
  • 2 eggs
  • 1 tsp vanilla
  • 1 1/2 flour – I used spelt flour, have yet to try this as gluten free
  • 1 1/2 tsp baking powder
  • 1 tsp baking soda
  • 1 cup sour cream
  • Filling: 1 cup brown sugar, 1 tbsp cocoa, 1 tsp cinnamon, 1/4 cup chopped nuts
  1. Preheat oven to 350F
  2. Cream together butter, sugar, eggs and vanilla
  3. In a separate bowl sift together flour, baking powder and soda
  4. Alternate this mixture into the butter mixture with the sour cream – always end with sour cream
  5. Put half the batter in a pan (angel food cake pan, you could make coffeecake muffins etc!) then half the filling (I would say actually more than half because I always have some leftover for a second cake!) then the rest of the batter, then sprinkle the top with the rest of the filling.
  6. Bake for about 45 min (if in a cake pan) at 350F.  Time will vary for other pans
  7. ENJOY, I KNOW I DO 🙂

Read Full Post »

mmm Father’s Day

So as we all know, father’s day was on Sunday and my dad got some brunch!  Now my dad is a big lover of lemony deserts, when my parents were married, my mother promised to make him a lemon meringue pie but that never happened so when he turned 60 I made the pie!  I think it turned out pretty tasty if I do say so myself.  I am also a big lover of lemony treats as well as the LCBOs Food and Drink Magazine.  I keep the for years and try to test out some of the recipes.  I recently came across a recipe for Lemon Ginger Oatmeal Cake from the Winter 2011 Edition.  I thought this would be a perfect cake to serve wtih brunch for father’s day!

Lemon Ginger Oatmeal Cake

**Note – I do not like ginger so I omitted it….

  • 1 tbsp finely chopped ginger
  • 1 cup of white sugar
  • 2 tbsp lemon juice – FRESHLY SQUEEZED (way better than store bought)
  • 1 cup dried cranberries
  • 1 tbsp grated lemon rind
  • 1 1/2 cups flour – just scooped and leveled off – I used spelt flour for this recipe
  • 1/2 cup bran – I didn’t have bran so I used ground oats (left over from the Neiman Marcus cookies!)
  • 1/2 cup quick cooking oats – I think I probably added more….feel free to experiment!
  • 1/4 tsp baking soda
  • 1 1/2 tsp baking powder
  • 1 tsp salt
  • 1/2 cup unsalted butter, softened – I used coconut oil and since it was so hot out it was melted
  • 1 cup buttermilk – 1 tbsp lemon juice/vinegar and then add enough almond milk to make 1 cup.  I used the lemon juice in this recipe since I had extra.

GLAZE

  • 2 cups icing sugar
  • 1 cup buttermilk
  • 1/4 cup chopped candied ginger
  • ** I just mixed some lemon juice with icing sugar to make a drizzle for the individual slices, since I knew a lot would be leftover and most likely eaten in the morning, I didn’t want to ice the whole cake just to keep it slightly healthier!
  1. Preheat Oven to 375F and grease a 9inch cake pan.  I juse used a springform pan to make my life easier!
  2. Place ginger, lemon juice and 1/4 cup sugar in a sauce pan and simmer on medium heat until sugar is dissolved.  Remove from the heat and add lemon zest and cranberries.  This will be added after the cake has been mixed!
  3. Combine flour, oats, (oat)bran, baking soda, baking powder and salt in a bowl and set aside.
  4. Beat butter (coconut oil), and sugar until creamy.  NOTE – I had to but the cocnut oil in the fridge for a bit to stiffen it up so it could then be beaten into a nice smooth mixture.  Beat in the eggs, one at a time.
  5. Add half the flour mixture, beating unitl combined and then half the buttermilk.  Repeat with the remaining flour and buttermilk.
  6. Stir in the cranberry-lemon mixture
  7. Spoon mixture into cake pan and then cook for about 40 minutes.  Let cook for about 5 minutes and then remove from the pan to continue cooling. 
  8. Add the glaze if you wish!

NOTE – I really like this cake, but my cranberries all went to the bottom of the cake and therefore so did most of the lemony taste.  Next time I might just add the lemon zest in seperately so it is more evenly spread out or reserve a bit of the lemon juice and add that to the butter-sugar-egg mixture.  All in all still good!

I will also mentioned that pancakes were part of this brunch menu and I had read about savory pancakes so I did a bit of an experiment and added cooked breakfast sausage and sharp grated cheddar cheese to some of the pancake batter and cooked up some savory pancakes!  I was told by my sister and dad that they were good. 

Read Full Post »

I am not a big fan of carrots or coconut but I love this soup!  A great friend and felow colleague of mine Dr. Kathy VanZeyl ND has provided me with this recipe and since I love soup during all seasons, why not post it in June 😛

  • 1 tbsp coconut oil
  • 2 onions, finely chopped
  • 4 cloves garlic, minced
  • 2 tsp turmeric (or curry powder)
  • 2 tsp cumin
  • 1 tsp sea salt
  • 1/2 tsp cracked black peppercorns
  • 1 can (28oz/796ml) tomatoes, including juice (I have also used just plain tomato sauce if I didn’t have tomatoes in stock)
  • 2 large carrots, peeled, cut in half lengthwise and thinly sliced
  • 2 cups red lentils, rinsed
  • 1 tbsp freshly squeezed lemon juice
  • 6 cups chicken stock
  • 1 can (14oz/398ml) coconut milk
  • Finely chopped cilantro (optional)
  1. In a large skillet, heat oil over medium heat for 30 seconds.  Add onions and cook, stirring until softened (about 3 minutes).  Add garlic, turmeric/curry, cumin, sea salt and peppercorns, stir and cook for about 1 minute. 
  2. Add tomatoes adn jice and bring to a boil, breaking up with the back of a spoon.
  3. Transfer to a slow-cooker.
  4. Stir in carrots, lentils, lemon juice and stock.
  5. Cover and cook on low for 8hrs or high for 4hrs, until lentils are tender
  6. Stir in coconut milk and cook on high for 20-30mintues, until heated through.
  7. When ready spoon into bowls and top with chopped cilantro.

Read Full Post »

Meatballs with Red Curry Peanut Sauce on Jasmine RiceI hope everyone enjoyed their long weekend, I did and I have been enjoying the sun and heat since then!  Yes I do love the heat!!

I love Thai food and I have been experimenting a little bit at home by making curries and this recipe comes from the LCBOs Food and Drink Magazine (Holiday Issue 2005).  I think its needs a bit more heat, so maybe a tsp or tbsp of green curry paste would do the trick or maybe some chili flakes or something….

Meatballs

  • 2 eggs
  • 1 cup frsh bread crumbs (I used kamut bread crumbs)
  • 2 tbsp fresh chopped basil
  • 2 tbsp freshly squeezed lime juice
  • 1 tbsp Thai red curry paste
  • 2lb lean ground pork or beef (I used ground turkey)
  1. Preheat oven to 450F
  2. In a large bowl combine eggs, bread crumbs, basil, lime juice and curry paste.
  3. Blend in ground meat.
  4. Form 1 1/2 inch balls and place on a greasted baking sheet about 1inch apart
  5. Bake for about 15 mine or until no longer cold inside, let cool sliglthy and refrigerate until cold.

Red Curry Peanut Sauce

  • 2 400-ml cans coconut milk, divided
  • 3/4 cup salted roasted peanuts, finely chopped
  • 1/4 cup packed brown sugar
  • 1 1/2 tbsp Thai red curry paste (I think I used 2 tbsp)
  • 2 tsp grated lime zest
  • 3 tbsp freshly squeezed lime juice
  • New Addition – I only had unsalted peanuts so I added a few dashes of fish sauce to the add that saltiness.
  1. In a saucepan, combine 2.5 cups coconut milk, peanuts, sugar and curry paste (and fish sauce if you are using some).  Bring to a boil over med-high heat and then reduce heat and gently boil for about 10 minutes, until the sauce has slightly thickened.
  2. Transfer to a heat proof container and let cool, then stir in the lime zest and juice and refrigerate until cold.

Rice

  • 2 cups jasmine rice, rinsed
  • 1 tsp salt (I omitted)
  • 1/4 cup chopped fresh basil
  • 1 tbsp chopped fresh mint
  1. Combine rice, remaining coconut milk, 3 cups water and salt (if using) and bring to a boil, stir once, cover and reudce heat to low and simmer for 15-20minutes.
  2. Once done, fluff with a fork, and spread out on parchment paper and refrigerate until cold (I didn’t dothis..)

Garnish

  • 1/4 cup flaked sweetened coconut
  • Chopped fresh basil and mint
  • Lime Wednges

Basically it is supposed to be served like a casserole, but of course you can just serve it as is and forget all the refrigeration that takes place to cut down on prep and time.

If you want to make it into a casserole (which is what I did after I had my initial dinner so that I could just freeze it as one):

  • Gently stir in basil and mint into rice and then pile rice into the middle of a shallow casserole dish, apparently making sure that the rice doesn’t extend to the sides of the dish.
  • Combine meatballs and sauce until coated and then spoon around the edges of the dish.
  • Cover the top with plastic wrap and then tinfoil and freeze for up to 2 months.
  • To reheat – remove plastic wrap and cover with foil.  If thawed then bake for 45min in a 275F over, an dif frozen then bake for about 75min
  • Serve sprinkled iwth coconut, fresh basil and mint; and garnish with lime wedges.

**Basically I mixed everything up together in the casserole dish so it wasn’t really picture quality and I also steamed some broccoli, snow peas, onions, and carrots to add a bit of veggies to the mix!  I ate it all mixed as one dinner and then froze the rest…so hopefully it turns out okay when I thaw it…we shall see..

As I mentioned I thought it had a good taste, but was just missing some more spice – but that can always be adjusted after the fact as well incase there are some people who do not like spice.


Read Full Post »

I have always loved to bake, and in the last few years I have gone dairy free and for the most part it is pretty easy to sbustitute butter and milk in recipes.  Unfortunately, sour cream and whipped cream are a completely differnet story, espeically if you are trying to stay soy free as well.  My sister also doesn’t eat wheat so for years my baking has been wheat and dairy free and really no one can tell the difference.  In the last little while I have been trying my hand at gluten free baking, and that does take a little more pizzaz!  I have made some chocolate cakes and brownies using the namaste mixes and they have also been delicious and no one could tell they were gluten free, but I wanted to start trying from scratch.

I also have a good friend who just did some food allergy testing and wheat and eggs came back as no-nos for her (among other things).  I wanted to make something that she could enjoy as a birthday desert and decided to kill 2 birds with one stone by making it for Mother’s Day as well!  I have what I think is a delicious strawberry shortcake recipe that was given to me by another excellent baker years ago, and its a more dense cake than a sponge cake, and best of all there are no eggs in it so its already vegan friendly!  Then I went serching for a vegan lemon curd to accompagny the shortcake and strawberries and really I could have eaten it all by itself….

So here we go!

Shortcake – preheat oven to 400F

  • 4 cups of flour – I used Bob’s Red Mill All-Purpose Gluten Free Flour (and I am pretty sure its the same as the All-Purpose one found at the Bulkbarn – same ingredients, so probably same proportions…)
  • 2 tbsp baking powder
  • 1 tsp baking soda
  • 1 tsp salt
  • 2 cups sugar
  • 1 cup butter – I used coconut oil
  • 2 cups buttermilk – any milk alternative and then just add 1 tbsp vinegar or lemon juice to make it sour
  • New addition – the zest of 1 lemon
  • New addition – 1 tsp vanilla
  • New addition – 3/4 tsp xanthum powder for every cup of flour used.  Just follow the directions on the back of the flour package for how much to add.  I chose the amount for muffins and quick breads because this cake is not a traditional cake and has that denser consistency and it worked out fine.

(this recipe can be halved!)

  1. Sift the flour, baking powder, baking soda, salt and sugar into a large bowl
  2. Cut in the butter/butter alternative (I put my cocnut oil in the fridge for a few minutes to harden it up a bit more), and mix/cream toghether until it gets that crumbly appearance
  3. Add in the sour milk, vanilla and lemon zest and just mix until the dry ingredients are moistened, being careful not to overmix.

Add to an greased or parchment-papered baking dish and sprinkly with sugar. Cook in a preheated oven set at 400F for 20-30minutes, until a toothpick or knife comes out clean.  I think mine took around 23-25min.

Vegan Lemon Curd – I forgot to save the link for this recipe but just google vegan lemon curd and it is close to the top.  I followed the directions almost exactly and it was divine!  THANKS 🙂

Cooking this recipe slowly and stirring constantly is key, otherwise it will not thicken properly.  Aloow it to cool completely before putting it in the fridge.

  • 1 1/4 cup fresh lemon juice (I only had enough lemons to make 1 cup so just added 1/4 cup water and it was still plenty lemony!)
  • 1 1/4 cup sugar
  • 2 tbsp fresh lemon zest (optional – I used it, don’t think it would be as good without)
  • 1/4 tsp salt
  • 2 tbsp coconut milk
  • 3 tbsp cornstarch dissolved in 3 tbsp cold water (next time I am going to try arrowroot starch)
  • 2 tbsp dairy-free soy margarine, divided – I used coconut oil
  1. In a small saucepan over medium heat, combine lemon juice, lemon zest, sugar, and salt stirring well to completely dissolve the sugar
  2. When the sugar is dissolved add the cornstarch mixture and coconut milk, stirring well to combine.  Stir constantly, cooking until the mixture begins to thicken and the first few bubbles appear on the surface, about 8 minutes.
  3. Add the dairy free margarine or coconut oil, stirring constantly, for several more minutes, or until the mixture starts to resemble a thick pudding.
  4. Transfer the mixture to a heat proff dish and let cool before placing in the refrigerator.  Best if you let it chill in the fridge for 2hrs before serving.
  5. Should last about 2 weeks when refrigerated and covered.

Cut up your strawberries and make a whipped cream if people so desire!

I like to cut the shortcake in half and then take the 2 halves, top with strawbwerries and lemon curd and for all you dairy lovers, a dollop or 2 of whipped cream to finish it off.

ENJOY!  (will have to take pictures next time)

Read Full Post »